Friday, November 7, 2008

To Open Explorer in MyComputer,


when we click on the My Computer icon, we use to get a display of all drives, But to see as a Explorer view ,do the following

1. Open RegEdit

2. Go to HKEY_CLASSES_ROOT\CLSID\ {20D04FE0-3AEA-1069-A2D8-08002B30309D}\ Shell

3 . Add a new Key named "Open" if it does not exists by right clicking "Shell" and selecting new.

4. Add a new Key named "Command" by right clicking "Open" and selecting new

5. Set the (Default) value for the Command Key to "Explorer.exe" or "C:\Windows\Explorer.exe"

To Disable Drives in My Computer


To disable the local or networked drives when we click on My Computer:

1.Run-->RegEdit

2.Browse HKEY_CURRENT_USER\Software\ Microsoft\ Windows\ CurrentVersion\ Policies\ Explorer

3.Now add a New DWORD item and name it NoDrives

4.Give it a value of 3FFFFFF

5.Now check My Computer, none of your drives will show.

To Make Browsing more speed.

Make a text file (notepad) and copy the following text,

Windows Registry Editor Version 5.00 [HKEY_LOCAL_MACHINE\SYSTEM\CurrentControlSet\Services\Dnscache\Parameters]
"CacheHashTableBucketSize"=dword:00000001
"CacheHashTableSize"=dword:00000180
"MaxCacheEntryTtlLimit"=dword:0000fa00
"MaxSOACacheEntryTtlLimit"=dword:0000012d
and rename the file as "dnscache.reg" and execute it. It will increase the Dnscache size and let u to browse more speeder.

Restricting guest access


Unauthorised users can access your Win2K PC by specifying Guest in the login window. To disable the Guest account, open Users and Passwords from the Control Panel. Click on the Advanced button twice to display the Local Users and Groups window. In the left pane, double-click on Users. Here, right-click on Guest and choose Properties. Once there, disable all options by clicking in the check box against each.

Monitoring shared folders

If you don't set the right permissions for your shared folders, unwanted users might gain access to them. Unlike in Windows 95 or 98, Windows 2000 allows you to close files that have been opened by unauthorised users-without unsharing the folders that contain them. To do this, right-click on the My Computer icon and choose Manage. In the window that opens, click on Shared Folders and then on Open Files. In the right pane, you can see all the files on your machine that have been opened by various users. Simply right-click on the file that you want to close, and click Close Open File.


Sunday, November 2, 2008

Changing name for Multiple files at one shot.

To avoid unrecognizable file names of our photos after downloading from our digital cameras,
We can rename several similar files at once with the following procedure. This will also works for renaming other types of files.
1.Open the My Pictures folder. (Click Start, and then click My Pictures.) Or open another folder containing files that you want to rename.
2.Select the files you want to rename. If the files you want are not adjacent in the file list, press and hold CTRL, and then click each item to select it.
3.On the File menu, click Rename.
4.Type the new name, and then press ENTER.

Disabling startup programs

To disable programs from automatically starting, you will need to do some registry tweaking.

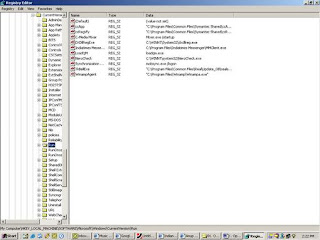
Go to Start > Run and type Regedit; the registry editor will open. Here, go to HKEY_LOCAL_MACHINE/Software/Microsoft/Windows/Current Version/Run. Here, look for the program strings of programs that you don't want to load at start up. Right click on that string and select Delete. The program will not be loaded during the next start up.
Note: before you do anything to the registry, always make a backup, so you can restore it in case something goes wrong.


Free system resources

We know that Windows 2000 is resource-hungry. To free up some memory-usage, go to Control Panel > Administrative Tools > Services. You will see the list of applications. From this list, look for applications you do not use. Double-click on them, and disable those services from the window that pops up.

Adding sub-menus to the Start menu

In Windows 2000, you can add a sub-menu to the Start menu for a group of users. This means that if you log in as user ABC, you will see a certain sub-menu, while user XYZ will see a completely different one. To enable this feature first log in as an administrator, then right click on the Start menu and click on Open All Users, and an explorer window will open. Click on the program folder, where you would like to add a sub-menu. Then click File > New > Menu. Enter the name of the new sub-menu and click anywhere on the desktop. Now, when users log in, they will see their personalised menus, as specified by you.

Increasing page file size (Virtual Memory)

You can increase the size of your virtual memory to improve performance by using a Page file. A page file is a certain amount of allocated space on the hard disk, that acts as additional memory. To change the amount of disk space allocated to page files, go to Control Panel > System > Advanced > Performance Options > Change. Now you will see the drives in your computer and the current disk space allocated for page file on each drive. To change the size, select the drive and, in the blank field below, specify the initial and maximum size in MB. Finally click on Set. Click on OK and restart the computer for the changes to take effect.

Shortcuts to Task and Device Managers

In order to quickly get to the Windows Task Manager or Device Manager, first create a shortcut, by right-clicking on the desktop, selecting New and then Shortcut.When you are in the Create Shortcut window, type in the following string: %windir%\System32\mmc.exe %systemroot%\system32\devmgmt.msc.

Click Next, and call the shortcut 'Device Manager'. Finally click Finish and the shortcut will be created on your system. The following are default shortcuts:[Ctrl] + [Shift] + [Esc] to access the Task Manager, and [Windows] + [Break] for System Properties.

Wednesday, October 22, 2008

Unable to uninstall MSN Messenger

To remove MSN Messenger in Windows XP, you have to locate the SYSOC.INF file, located in the \Windows\INF folder-this is a hidden file and folder. Open it in Notepad and locate the line 'msmsgs=msgrocm.dll,OcEntry,msmsgs.inf,hide,7'. Remove the word 'hide' from the line and save the file. After making the necessary changes, you'll be able to see MSN Messenger in the Add/Remove Windows components list. You can then remove it for good.

Using OnScreen Keyboard

An onscreen keyboard is in-built in Windows XP. It can be useful if you are using a tablet PC or if your keyboard goes on the blink. To access the keyboard, go to Start > Run, type OK and press [Enter]. The keyboard opens up on your computer screen, featuring three typing modes that you can use to type data:
Clicking mode: you click the on-screen keys.
Scanning mode: you press a hot key, or use a switch-input device, to type highlighted characters.
Hovering mode: you use a mouse or joystick to point to a key, which is then typed.

Speeding up network browsing

A bug in Windows 2000, causes the scheduled tasks folder to be searched, whenever the user browses network drives. While Microsoft has developed a fix for this bug, the fix slows down the browsing of Microsoft networks. In order to fix this problem, go to Start > Run,type in regedit and press [Enter]. Navigate to HKEY_LOCAL_MACHINE/Software/Microsoft/Windows/Current Version/Explorer/RemoteComputer/NameSpace. Then find a key named {D6277990-4C6A-11CF-8D87-00AA0060F5BF}. Right-click on it and delete it. Restart the computer. Now you will be able to browse the network a lot faster.

Switching users


Windows XP allows you to switch users, without actually quitting programs and logging off. To make use of this, go to Start > Log off. You will be greeted with an option of 'switching user' wherein another user can log on without you having to quit your programs.

Tuesday, October 21, 2008

Speedup the Start menu

The Start menu takes quite a while to display the list of programs installed. In order to get Windows XP to display the list faster, you will have to edit the registry settings. To speed up your Start menu, go to Start > Run and type regedit. This will open the registry window. Then navigate to the following key: HKEY_CURRENT_USER\Control Panel\Desktop. Scroll down in the right panel and double-click on 'menushowdelay'. In the Value Data box, change the default value for the menu speed from 400 to a lesser number, such as 1 or even 0. Click OK. You should now find a significant increase in the Start menu speed.Note: Remember to back up your registry before making any changes.

Clearing Document list

The Start menu, in Windows XP, has been completely revamped and made extremely customisable. If you want the Start menu to display only certain applications, right click in an empty section of the Start menu's left column and select Properties > Start menu > Customise. Then, go to the General tab, click on Clear List, and set the counter to zero. Now no one can keep track of the programs or applications you've recently used.

Disabling error reporting

Windows XP, like Windows 2000, provides a report of errors that are generated during a session. In order to disable it, right-click on the My Computer icon, go to Properties, and click on the Advanced tab. At the bottom of this tab, you will find the 'Error reporting' option. Click it and you will get an option to enable or disable it. Click Disable and you are done.

Bridging connections

If you'd like to connect two or more computers via a LAN, then you should utilise the Network Bridge option, provided in Windows XP. There is no configuration required, and you do not need to purchase additional hardware, such as routers or bridges. IP addressing, address allocation, and name resolution, are highly simplified in a single subnet IP network. To use this feature you will have to open Network Connections. Under LAN or High-Speed Internet, select each of the private network connections that you want to be part of the bridge. Right-click one of the highlighted private network connections and click Bridge Connections.

Modifying visual settings

If you have only 128 MB RAM, your machine might be a bit sluggish after installing Windows XP. So to achieve optimal performance without buying additional RAM, disable certain visual settings and free up some precious memory.
Go to the Control Panel > system > Advanced, and click on the Settings button under Performance. Change various graphical effects, and ensure that the animation and shadow options are unchecked, as they tend to consume a lot of memory. You should get a better response from your operating system, without spending any money on RAM.


Group Policy Editor


In Windows XP Professional, there is a utility that allows you to change almost every setting of the OS, without having to manually edit the registry.
In order to access the program, go to Start > Run and type gpedit.msc and press [Enter]. Now you can navigate and change the options as you wish. We have some examples here, but you can also try changing other settings.


Restricting guest access

Unauthorised users can access your Win2K PC by specifying Guest in the login window. To disable the Guest account, open Users and Passwords from the Control Panel. Click on the Advanced button twice to display the Local Users and Groups window. In the left pane, double-click on Users. Here, right-click on Guest and choose Properties. Once there, disable all options by clicking in the check box against each.

Renaming Multiple files in XP

In Windows XP, you can easily rename multiple files at a single go and save a lot of time. Click Start and click My Pictures or the folder where you have saved the pictures. Switch the view from the default Filmstrip to Thumbnails by clicking the Views button on the toolbar. Select all the pictures you want to rename, right click the first picture, and then click Rename. Rename the first picture, and then click in the white space next to one of the pictures. The pictures are renamed all at once! For example, if you select 10 JPEG pictures, and name them XYZ, the files will be named: XYZ.JPG, XYZ (1).JPG, XYZ (2).JPG, and so on to XYZ (9).JPG.

Monday, October 13, 2008

How to Rename the Recycle Bin

As per Vijay's request, I am posting this tips.,

To change the name of the Recycle Bin desktop icon, open Regedit and go to:
HKEY_CLASSES_ROOT/CLSID/{645FF040-5081-101B-9F08-00AA002F954E}
and change the name "Recycle Bin" to whatever you want (don't type any quotes).

How To Enable HibernationUnder in XP

In Windows 98, Me, or 2000 there was an option in the shutdown dialog box to enter the computer into hibernation (where all the content of the RAM is copied to the hard disk). The shutdown dialog box of Windows XP doesn't offer any longer the hibernation button. Some users may get confused about how to enable the hibernation mode. If this mode is supported by your motherboard (ACPI) you have to do the following:
Click Start and Shut Down,
Point the standby button and maintain the shift key pressed
A new hibernation button appears: click it while still holding the shift key: Now your PC will hibernate.

How to Convert FAT to NTFS file system

To convert a FAT partition to NTFS, perform the following steps.
Click Start, click Programs, and then click Command Prompt.
In Windows XP, click Start, click Run, type cmd and then click OK.
At the command prompt, type CONVERT [driveletter]: /FS:NTFS.
Convert.exe will attempt to convert the partition to NTFS.

NOTE: Although the chance of corruption or data loss during the conversion from FAT to NTFS is minimal, it is best to perform a full backup of the data on the drive that it is to be converted prior to executing the convert command. It is also recommended to verify the integrity of the backup before proceeding, as well as to run RDISK and update the emergency repair disk (ERD).

How to use Windows Update Properly

If you want to save your files to your hard drive, so after a format you dont have to download them all again, here's How:
- Logon to Windows Update
- Choose Windows Update Catalogue (left hand pane)
- Choose Find updates for Microsoft Windows operating systems (right hand pane)
- Choose your version and language then Search
- Choose one the following:
- Critical Updates and Service Packs - Service Packs and Recommended Downloads - Multi-Language Features (0)
- Once chosen simply click on what you want to download and then back at the top click Review Download Basket
- You are taken to the next page where at the top you can specify where the downloads are to be saved.
- Click Download now. Each patch will make a directory under the root of the folder you saved them to. Once finished you need to go to where you saved the file (s) to and then simply install all your patches.

NTFS vs. FAT

NTFS vs. FAT

FAT16

The FAT16 file system was introduced way back with MS–DOS in 1981, and it's showing its age. It was designed originally to handle files on a floppy drive, and has had minor modifications over the years so it can handle hard disks, and even file names longer than the original limitation of 8.3 characters, but it's still the lowest common denominator. The biggest advantage of FAT16 is that it is compatible across a wide variety of operating systems, including Windows 95/98/Me, OS/2, Linux, and some versions of UNIX. The biggest problem of FAT16 is that it has a fixed maximum number of clusters per partition, so as hard disks get bigger and bigger, the size of each cluster has to get larger. In a 2–GB partition, each cluster is 32 kilobytes, meaning that even the smallest file on the partition will take up 32 KB of space. FAT16 also doesn't support compression, encryption, or advanced security using access control lists.


FAT32

The FAT32 file system, originally introduced in Windows 95 Service Pack 2, is really just an extension of the original FAT16 file system that provides for a much larger number of clusters per partition. As such, it greatly improves the overall disk utilization when compared to a FAT16 file system. However, FAT32 shares all of the other limitations of FAT16, and adds an important additional limitation—many operating systems that can recognize FAT16 will not work with FAT32—most notably Windows NT, but also Linux and UNIX as well. Now this isn't a problem if you're running FAT32 on a Windows XP computer and sharing your drive out to other computers on your network—they don't need to know (and generally don't really care) what your underlying file system is.


The Advantages of NTFSThe NTFS file system, introduced with first version of Windows NT, is a completely different file system from FAT. It provides for greatly increased security, file–by–file compression, quotas, and even encryption. It is the default file system for new installations of Windows XP, and if you're doing an upgrade from a previous version of Windows, you'll be asked if you want to convert your existing file systems to NTFS. Don't worry. If you've already upgraded to Windows XP and didn't do the conversion then, it's not a problem. You can convert FAT16 or FAT32 volumes to NTFS at any point. Just remember that you can't easily go back to FAT or FAT32 (without reformatting the drive or partition), not that I think you'll want to.

NTFS


The NTFS file system is generally not compatible with other operating systems installed on the same computer, nor is it available when you've booted a computer from a floppy disk. For this reason, many system administrators, myself included, used to recommend that users format at least a small partition at the beginning of their main hard disk as FAT. This partition provided a place to store emergency recovery tools or special drivers needed for reinstallation, and was a mechanism for digging yourself out of the hole you'd just dug into. But with the enhanced recovery abilities built into Windows XP (more on that in a future column), I don't think it's necessary or desirable to create that initial FAT partition.

When to Use FAT or FAT32

If you're running more than one operating system on a single computer , you will definitely need to format some of your volumes as FAT. Any programs or data that need to be accessed by more than one operating system on that computer should be stored on a FAT16 or possibly FAT32 volume. But keep in mind that you have no security for data on a FAT16 or FAT32 volume—any one with access to the computer can read, change, or even delete any file that is stored on a FAT16 or FAT32 partition. In many cases, this is even possible over a network. So do not store sensitive files on drives or partitions formatted with FAT file systems.

Monday, October 6, 2008

Dial-a-Fix

DAF (This is a document which i got from wiki -pedia).


Dial-a-fix is an advanced utility for 32-bit versions of Microsoft Windows written by DjLizard in Borland Delphi 7 that repairs various Windows problems, such as:
- Windows Update errors and problems with Automatic Updates
- SSL, HTTPS, and Cryptography service (signing/verification) issues
- COM/ActiveX object errors and missing registry entries And more
.


Dial-a-fix (hereafter known as "DAF") is a collection of known fixes gleaned from Microsoft Knowledgebase articles, Microsoft MVPs, and other important support forums, that will assist you in repairing problems with your system. Although this tool is ordinarily meant for power users, technicians, and administrators, it is quite safe to use even without technical guidance (although guidance is recommended). Simply choose the solutions you wish to apply via checkmarks, and click GO. There are other buttons and tools present on the main dialog as well, such as the policy scanner. All tools and checkmarks identify their purpose when you mouse over them.


DAF primary philosophy is to fix problems by setting various things back to their original Microsoft defaults. DAF currently does not interface with or repair any third party programs (and there are no plans to do so).


Dial-a-fix is 100% freeware to use and redistribute, as long as the file is unmodified (the MD5 sum can be found below) and as long as no money is being charged for access to the file. No mirrors of Dial-a-fix are necessary at this time.. It is completely free for personal or corporate use, however, under no circumstances will I take any responsibility for your use or inability to use Dial-a-fix, and its results (or lack thereof).


Dial-a-fix is designed to be easy to use (although its options seem daunting at first - ask for help at the Lunarsoft.net forums if necessary!), but it is highly recommended to use it under the guidance of a technician. Although Dial-a-fix by itself can pose no harm to your system, there are situations which Dial-a-fix simply cannot account for. If you have experienced exaggerated problems due to the usage of Dial-a-fix, contact a computer technician immediately (preferably one with experience using Dial-a-fix, and more preferably the Lunarsoft.net forums).

The following is an incomplete list of examples of known problems that can cause Dial-a-fix to exaggerate or expose issues on your system:


Dial-a-fix is not likely to be the source of the additional issues, as it only performs procedures recommended and supported by Microsoft, Microsoft MVPs, and other highly respected members of the Windows internals community. These procedures include, but are not limited to: registering DLLs/COM objects, stopping, re-registering, starting, and configuring services to their original Microsoft-supplied defaults.

Vista Knowledge base

We can get help for all Vista related issues in following link,
http://windowshelp.microsoft.com/communities/newsgroups/en-us/default.mspx

Unable to Install IE7 in windows xp

Problem faced : Was Unable to Install IE7 in Windows XP
Cause : Service Pack 3
Action taken : Uninstalled SP3, rebooted and Installed Ie7 after Ie7, reinstalled again SP3.
Note:
Install IE7 before installing SP3 in windows xp.

Saturday, October 4, 2008

Windows Server 2003

Introducing Windows Server 2003:

Windows server 2003 family comprising four Operating systems, to give best support for applications, networks and web services.

Standard Edition.

Standard edition suits everyday business needs such as Files and printer sharing, Internet connectivity, centralized desktop application deployment and connectivity about employees and customers.

It supports 4 processors, but it doesn't support clustering.

Enterprise Edition.

Enables business to develop, deliver and secure applications, web services and infrastructures.

Its available in 32bit and 64 bit editions.

It supports up to 8 processors and up to 8 cluster nodes.

Datacenter Edition.

It provides scalability and availability for business critical and mission critical applications.

Its available in 32bit and 64 bit editions.

It supports between 8 to 32 processors and up to 8 cluster nodes.

Web Edition.

Web Edition serves and hosts web pages. Ensures reliablity, manageablity and security.

It supports up to 2 processors.

Hardware specifications

Standard Edition

- CPU recommended speed 550mhz (mininmum)

- RAM speed 256 mb minimum and 4 GB maximum.

- 1.5 GB of disk space (HDD) to setup.

Enterprise Edition

- CPU recommended speed 733mhz(mininmum)
- RAM speed 256 mb minimum and 32GB of maximum for x86 based computers and 64 GBof maximum for Itanium based computers
- 1.5 GB of disk space (HDD) to setup for x86 based computers and 2.0GB for Itanium based computers

Datacenter Edition

- CPU recommended speed 733mhz(mininmum)

- RAM speed 1GBminimum and 64GB of maximum for x86 based computers and 512 GB of maximum for Itanium based computers

- 1.5 GB of disk space (HDD) to setup for x86 based computers and 2.0GB for Itanium based computers

Web Edition

- CPU recommended speed 550mhz (mininmum)

- RAM speed 256 mb minimum and 2 GB maximum.

- 1.5 GB of disk space (HDD) to setup.

Friday, October 3, 2008

Spyware

Defnition

Spyware, generally refers to programs installed on your computer, usually without your knowledge. It can transmit personal information to companies. These companies use this data in a number of ways including selling it to others, using it for marketing data, or tracking browsing habits.

This is getting to be a big reason why people are getting so much spam e-mail.
Spyware can also install other software at the same time or make your computer vulnerable to other programs being installed.

Symptoms

There are several general symptoms that your computer is infected with spyware.

1.Home Page and Search Pages changing
2.There are a lot of pop-up windows.
3.The computer recently has poor performance and is crashing frequently.
4.There are icons being added to your Desktop or Favorites that you didn't put there.

Prevention

1. Do not click on any links in an E-mail with unless you are absolutely sure that the website will not infect your computer.

2. Be very careful of music or peer-to-peer file sharing web sites.

3.Do not install any software from the Internet unless you are absolutely sure it will not infect your computer. This includes freeware, greeting cards, screensavers, music, on-line games, extra toolbars, cutsie little add-ons, etc.

Removal

There are several removal programs available to remove the spyware successfuly,
I Listed some good Anti-spyware programs here.

1. Spysweeper.
2. Ewido.
3. Ad-Aware.
4. Pest Patrol.
5. Microsoft Anti-spyware.
6. Kaaza Be Gone.
7. HiJack This.
These are the programs I used with great success in removal of spywares.

Now, run the programs you installed and updated to scan for and remove spywares.

Recommendation

1. It is best running these programs in Safe-mode, always. Because, This loads a minimal set of drivers (which is why the screen display is not as clear) as well as not start most of the items that are selected to start automatically. This is why a scan from Safe Mode can be more effective, since hopefully the spyware hasn't loaded yet and can mores easily removed.

2. Only use Hijack This if you are an experience computer user. It is very good for disabling programs that are starting automatically. But you also need to be knowledgeable for what to remove


Removing Unwanted Programs In Startup

Many programs add portions of themselves starting automatically on every login.This can be either in the Startup Folder or the Registry.

One easy way to tell is by looking at how many icons are in your system tray. If you have a large number, perhaps unnecessary resources are being allocated them as well as increasing your boot time.
Typical examples are Microsoft Office, Office FindFast, Real Player, ATI Video setting etc.

You can remove them in one of three main ways:
In the Start / Programs / Startup Folder
In the Registry under HKEY_LOCAL_MACHINE \ SOFTWARE \ Microsoft \ Windows \ CurrentVersion \ Run
If you have Win98, WinME or Windows2000 you can use MSCONFIG to easily remove programs. This is my preference since it allows you to toggle them back on again in case you make a mistake

Sunday, September 28, 2008

To Remove a Branded Logo from IE

To replace the vendor spinning logo in IE to default,
>Start >Run
Enter in rundll32 iedkcs32.dll,Clear
Restart your browser, logo will get change back to default one.

Keyboard Shortcuts for Internet Explorer.

F1
Display the Internet Explorer Help, or when in a dialog box, display context help on an item
F11
Toggle between Full Screen and regular view of the browser window
TAB
Move forward through the items on a Web page, the Address bar, and the Links bar
SHIFT+TAB
Move back through the items on a Web page, the Address bar, and the Links bar
ALT+HOME
Go to your Home page
ALT+RIGHT ARROW
Go to the next page
ALT+LEFT ARROW or BACKSPACE
Go to the previous page
SHIFT+F10
Display a shortcut menu for a link
CTRL+TAB orF6
Move forward between frames
SHIFT+CTRL+TAB
Move back between frames
UP ARROW
Scroll toward the beginning of a document
DOWN ARROW
Scroll toward the end of a document
PAGE UP
Scroll toward the beginning of a document in larger increments
PAGE DOWN
Scroll toward the end of a document in larger increments
HOME
Move to the beginning of a document
END
Move to the end of a document
CTRL+F
Find on this page
F5 orCTRL+R
Refresh the current Web page only if the time stamp for the Web version and your locally stored version are different
CTRL+F5
Refresh the current Web page, even if the time stamp for the Web version and your locally stored version are the same
ESC
Stop downloading a page
CTRL+O or CTRL+L
Go to a new location
CTRL+N
Open a new window
CTRL+W
Close the current window
CTRL+S
Save the current page
CTRL+P
Print the current page or active frame
ENTER
Activate a selected link
CTRL+E
Open Search in Explorer bar
CTRL+I
Open Favorites in Explorer bar
CTRL+H
Open History in Explorer bar
CTRL+click
In History or Favorites bars, open multiple folders
Using the Address bar
Press this
To do this
ALT+D
Select the text in the Address bar
F4
Display the Address bar history
CTRL+LEFT ARROW
When in the Address bar, move the cursor left to the next logical break (. or /)
CTRL+RIGHT ARROW
When in the Address bar, move the cursor right to the next logical break (. or /)
CTRL+ENTER
Add "www." to the beginning and ".com" to the end of the text typed in the Address bar
UP ARROW
Move forward through the list of AutoComplete matches
DOWN ARROW
Move back through the list of AutoComplete matches
Working with favorites
Press this
To do this
CTRL+D
Add the current page to your favorites
CTRL+B
Open the Organize Favorites dialog box
ALT+UP ARROW
Move selected item up in the Favorites list in the Organize Favorites dialog box
ALT+DOWN ARROW
Move selected item down in the Favorites list in the Organize Favorites dialog box
Editing
Press this
To do this
CTRL+X
Remove the selected items and copy them to the Clipboard
CTRL+C
Copy the selected items to the Clipboard
CTRL+V
Insert the contents of the Clipboard at the selected location
CTRL+A
Select all items on the current Web page

Thursday, September 25, 2008

To make Network Access with Blank Passwords with Vista

In Vista, by default it does not allow network users to access the computer without a password, Although you can log in locally without a password.,

To change this setting:

1. Click on start-->Run-->type ' gpedit.msc'
2. Click on computer configuration on left panel.
3. Double click on 'Windows settings' then open 'security settings'
4. Open 'Local policies' then open 'security options'
3. Right click on Accounts- Limit local account use of blank passwords to console login only and go to properties.
4.In the options Just Disable this option

To remove the Shortcut Arrows

1. Run > REGEDIT.EXE
2. Go to the key HKEY_CLASSES_ROOT
3. Browse the Key LNKFILE
4. Right click and Rename the value IsShortcut
5. Log off and log in again.
( Reset it, just rename the key back again, and log off and log on).

Friday, September 19, 2008

Tricks : Icons without any name!!!!!!!!!

Yep ! Its possible to make ur desktop icons with out any name by following the steps given below.

1.Turn on the Numlock key.
2.Just Right click any icon on desktop and select 'Rename' option on drop down menu.
3.Hold ALT key and just type '0160' and Enter.
4.Now U made a ICON with out any name :)

Monday, September 15, 2008

To Improve performance in VISTA

To Improve the system performance You Can Disable following services in Vista

1. Windows Search
2. Diagnostic Policy Service
3. Offline Files
4. Diagnostic System Host
5. Diagnostic Service Host
6. Windows Error Reporting Service
7. Terminal Services
8. Desktop Window Manager Session Manager

Bringing the IE 7 Icon to the desktop

Sometimes, the icon for the Internet Explorer 7 does not appear on the Vista desktop
To create it back again, follow the process here
Paste the following lines in notepad and SaveAs '.reg' file and execute.
Windows Registry Editor Version 5.00
[HKEY_CURRENT_USER\Software\Microsoft\Windows\CurrentVersion\Explorer\HideDesktopIcons\NewStartPanel]"{871C5380-42A0-1069-A2EA-08002B30309D}"=dword:00000000

Fixing Winsock Registry Entry after corruption


Fixing corrupted Winsock Registry Entry
Symptoms - can't connect to the Internet
Solution
run:
netsh winsock reset

and then reboot your Unit.

To fix Corrupted TCP/IP Files

If TCP/IP files corrupted, then in Run command, execute the following commands and reboot
'netsh interface ipv4 '
'resetnetsh interface ipv6 reset '

For Vista Drivers

http://driveragent.com/exe?&browser=Microsoft%20Internet%20Explorer

Explanation of Error Codes Generated by Device Manager

While trouble shoooting Any Driver related Issues, Make use of the Error codes to find out the exact Solution for the Problem Using the Error Codes Shown in Device Manager.

See this Link for Detailed Error Codes and Solution on how to resolve it.

http://support.microsoft.com/kb/125174

How to take ownership of a file or folder in Windows XP

This article explains how to take a file or folder ownership in a Windows XP PC.

Visit http://support.microsoft.com/kb/308421

How to resolve Common "Windows Installer" problem

How to resolve Common "Windows Installer" Problems When you try to install/uninstall some application/s, you may get warning messages like:
"The Windows Installer Service could not be accessed"
"Windows Installer Service couldn’t be started"
"Could not start the Windows Installer service on Local Computer. Error 5: Access is denied." Related to: Windows Updates Resolution:
There are about 12 Methods to resolve this issue. Visit here http://support.microsoft.com/kb/555175 for more detailed info about the steps.

Proper way to Uninstall Internet Explorer 7.0


How to Uninstall Internet Explorer 7


Method 1: Use "Add or Remove Programs" to uninstall Internet Explorer 7
Step 1: Use "Add or Remove Programs" to uninstall Internet Explorer 7

Ø Click Start, and then click Run.
Ø In the Open box, type appwiz.cpl, and then click OK.
Ø In the list of programs, click Windows Internet Explorer 7, and then click Remove.
Ø Follow the wizard instructions to uninstall Internet Explorer 7.

After you uninstall Internet Explorer 7, double-click the Internet Explorer icon to verify that Internet Explorer 6 is restored. If you cannot uninstall Internet Explorer 7 by using this method, try Method 2.

Method 2: Use Spuninst.exe to uninstall Internet Explorer 7
Step 1: Make hidden files and hidden folders visible

Ø Click Start, and then click My Documents.
Ø On the Tools menu, click Folder Options.
Ø Click the View tab.
Ø In the Advanced settings list, under Hidden files and folders, click Show hidden files and folders, and then click OK.
Step 2: Run Spuninst.exe to uninstall Internet Explorer 7

Ø Click Start, and then click Run.
Ø In the Open box, type %windir%\ie7\spuninst\spuninst.exe, and then click OK.
Ø Follow the wizard instructions to uninstall Internet Explorer 7.

After you uninstall Internet Explorer 7, double-click the Internet Explorer icon to verify that Internet Explorer 6 is restored.


Reference Microsoft KB KB927177


How to Uninstall Internet Explorer 7 if Beta 2 Version is installed

Step 1: Make sure that you meet the requirements to run the Internet Explorer 7 Beta 2 Uninstall Tool

If the computer and Internet Explorer meet the following requirements, you can use the Internet Explorer 7 Beta 2 Uninstall Tool to remove Internet Explorer 7 Beta 2.Warning Use the Internet Explorer 7 Beta 2 Uninstall Tool only if the computer and Internet Explorer match the following requirements. Serious problems might occur if you use this tool on a computer that does not meet these requirements. These problems might require that you reinstall the Windows operating system.


Step A: Determine the version of Internet Explorer 7
To determine which version of Internet Explorer 7 is on your computer, follow these steps:

1. Start Internet Explorer 7.
2. Press ALT, and then click About Internet Explorer in the Help menu.

The version of Internet Explorer 7 appears in the About Internet Explorer dialog box. To use the Internet Explorer 7 Beta 2 Uninstall Tool, you must have Internet Explorer 7 version 7.0.5346.5 installed.


Step B: Make sure that the path of the folder where Windows is installed is C:\Windows.

To determine the path of the folder where Windows is installed, click Start, and click Run, type % windir% in the Open box, and then click OK.If you see C:\WINDOWS in the Address box of Windows Explorer, Windows is installed in the folder.

Step C: Make sure that the path of the folder where programs are installed is C:\Program Files

To determine the path of the folder where programs are installed, click Start, click Run, type %Program Files% in the Open box, and then click OK.If you see C:\Program Files in the Address box of Windows Explorer, programs are installed in the folder.


Step D: Make sure that you are running Windows XP on a 32-bit computer

1. Click Start, click Run, type msinfo32.exe in the Open box, and then click OK.
2. In the System Information dialog box, type Processor under Find what, and then click Find.

If you see "x86" in the Value column of the Processor item, you are running Windows XP on a 32-bit computer.

Step 2: Download the Internet Explorer 7 Beta 2 Uninstall Tool

To download the tool, follow these steps:
a. Click the link that is provided immediately following step 2d.
b. In the File Download dialog box, click Run.
c. In the security warning dialog box, click Run when you are asked whether you want to run this software.
d. In the Warning dialog box, click yes to uninstall Internet Explorer 7 Beta 2.
The following file is available for download from the Microsoft Download Center:
Download the Internet Explorer 7 Beta 2 Uninstall Tool package now.

Refer Microsoft Kb 923721
Note:
If IE7 Beta 2 does not appear in Add/Remove Programs, you will need to run the following command:
%windir%\$NtUninstallie7bet2p$\spuninst\spuninst.exe (according to the Release Notes) or%windir%\$NtUninstallie7b2pmx$\spuninst\spuninst.exe
Error message: IE7 must be uninstalled from the User Account that installed it - Go to the key: HKEY_CURRENT_USER\Software\Microsoft\Internet Explorer.
Right click on Internet Explorer and select New String Value. Name that value InstalledByUser. The value of the new String should be your User account name.

Saturday, September 13, 2008

Hi-Techies.

Hi,

We are just here to share our most remarkable and challengeous moments in our field.
I am just putting the things I learned in my day-by-day work here, and I highly expecting your Ideas and suggestions. You can mail your TIPS to me , so that I can publish here.
E-mail : manoharan.jj@gmail.com.

With Love,
Mano.
அன்பே சிவம்

Template by - Abdul Munir | Daya Earth Blogger Template